Section 5 – Appendices
Appendix D – Building Wort Chillers
Wort chillers are copper heat exchangers that help cool the wort quickly after the boil. There are two basic types, immersion and counterflow. The first works by circulating cold water through the tubing, which is then submerged in the hot wort. The counterflow version works by running the hot wort through the tubing, while cold water runs outside in the opposite direction. The basic material for both types is 3⁄8-inch diameter soft copper tubing. Half-inch diameter tubing also works well, especially for large-scale immersion chilling, but 3⁄8-inch is the most common. Do not use less than 3⁄8-inch, because the restricted water flow impairs cooling efficiency.
Immersion Chillers
Immersion chillers are the simplest to build and work very well for small boils done on the stove in the kitchen. An immersion chiller is easy to construct. Simply coil about 30 to 50 feet of soft copper tubing around a pot or other cylindrical form. Springlike tube benders can be used to prevent kinks from forming during bending. Be sure to bring both ends of the tube up high enough to clear the top of your boiling pot. Attach compression-to-pipe-thread fittings to the tubing ends. Then attach a pipe-thread to a standard garden hose fitting. This is the easiest way to run water through the chiller without leaking. The cold water “in” fitting should connect to the top coil, and the hot water “out” should be coming from the bottom coil for best chilling performance. An illustration of an immersion chiller is shown at left and in Figure 55 on p. XX.
The advantages of an immersion chiller are that it is easily sanitized by placing it in the boil, and it will cool the wort before it is poured into the fermenter. This allows you to separate the wort from the cold break. Make sure the chiller is clean (but not necessarily shiny) before you put it into the wort. Place it in the boiling wort during the last few minutes before the heat is turned off, and it will be thoroughly sanitized. Working with cool wort is much safer than working with hot wort. The cool wort can be poured into the fermenter with vigorous splashing for aeration without having to worry about oxidation damage. The wort can also be poured through a strainer to keep the spent hops and much of the break material out of the fermenter.
The advantages of an immersion chiller are that it is easily sanitized by placing it in the boil, and it will cool the wort before it is poured into the fermenter. This allows you to separate the wort from the cold break. Make sure the chiller is clean (but not necessarily shiny) before you put it into the wort. Place it in the boiling wort during the last few minutes before the heat is turned off, and it will be thoroughly sanitized. Working with cool wort is much safer than working with hot wort. The cool wort can be poured into the fermenter with vigorous splashing for aeration without having to worry about oxidation damage. The wort can also be poured through a strainer to keep the spent hops and much of the break material out of the fermenter.
Counterflow Chillers
Counterflow chillers are a bit more difficult to build but cool the wort a bit better. Counterflow chillers use more water to cool a smaller volume of wort faster than an immersion chiller, so you get a better cold break and clearer beer. The drawbacks are that the cold break is carried into the fermenter with the wort, it’s harder to keep the inside of the chiller clean, and it’s hard to keep hops and hot break material in the kettle from clogging the intake. A copper pot scrubby attached to the end of the racking cane will help.
The increased efficiency of a counterflow chiller lets you use a shorter length of tubing to achieve the same amount of wort cooling. The tube-within-a-tube chiller can be coiled into a convenient roll. The hot side of the chiller, the racking tube intake, needs to be copper or another heat-resistant material. Plastic racking canes tend to melt from the heat of the pot when the hot wort is siphoned into the chiller. Counterflow chillers are best used when there is a spigot mounted on the side of the pot, negating the need to siphon the wort.
Figure 171 shows one example for building the counterflow fittings and assembling the copper tubing inside the garden hose. First, cut off the ends of the garden hose, and slide the 3⁄8-inch soft copper tubing through the hose. Apply some dishwashing detergent to help slide the tube through the hose. Next, re-coil the hose/tubing to make it more compact. Then assemble the fittings, using common ½-inch inner diameter rigid copper tube, an end cap, and sweat-type T fittings. Solder them together using lead-free silver solder and a propane torch. Reattach the hose ends via the tube clamps to the T’s. Drill a 3⁄8-inch diameter hole through the end cap, and slip it over the ends of the soft copper tubing, which the wort will travel through. Seal the openings for the tubing with a fillet joint soldered around the hole.
There is a company that manufactures fittings for building counterflow chillers. These fittings are known as Phil’s Phittings from the Listermann Manufacturing Company (www. listermann.com). The fittings make building a counterflow chiller easy.
Hybrid Chillers
Author's Note, 2025: Turns out it's really difficult to coil the copper tight enough to fit inside the 6" PVC (or ABS). I don't think anybody actually used this design. The counterflow design works very well, and plate chillers are fairly common from shops.
There is a third type of chiller that is a hybrid of the previous two types. This chiller has the hot wort flow through the copper tubing like a counterflow, but the cooling water bathes the coil similar to an immersion chiller. This type of chiller can be built for about the same cost as a counterflow. The basic materials are 2 feet of 6-inch diameter PVC pipe, and 20 to 30 feet of 3⁄8-inch copper tubing. Brass or plastic hose barbs can be used for the water fittings, but brass compression fittings should be used to attach the copper tubing to the hot side of the chiller. To obtain a good seal, a rubber washer and the “flat” of the compression-to-pipe-thread fitting should be on the inside of the PVC pipe. With this type of chiller, it is important to have good water flow to get a good chill. One option is to place a smaller-diameter, closed PVC pipe inside the copper coil to increase the flow of cooling water along the coils, rather than through the middle of the chiller body.
Plate Chillers
Plate chillers made from thin sheets of brazed stainless steel have recently come to the homebrewing market and are similar to what professional brewers use daily for chilling their wort. While these can’t be built at home, they are very efficient, and I thought I would mention them as an available option. Plate chillers are somewhat expensive (around $100), but they work so well that the cost is justified. They can chill 10 gallons to within a few degrees of the water temperature in five minutes. They need more care in cleaning after use because they have crevices, and you cannot store them wet. Always flush them thoroughly with clean water, and drain them as well as you are able.
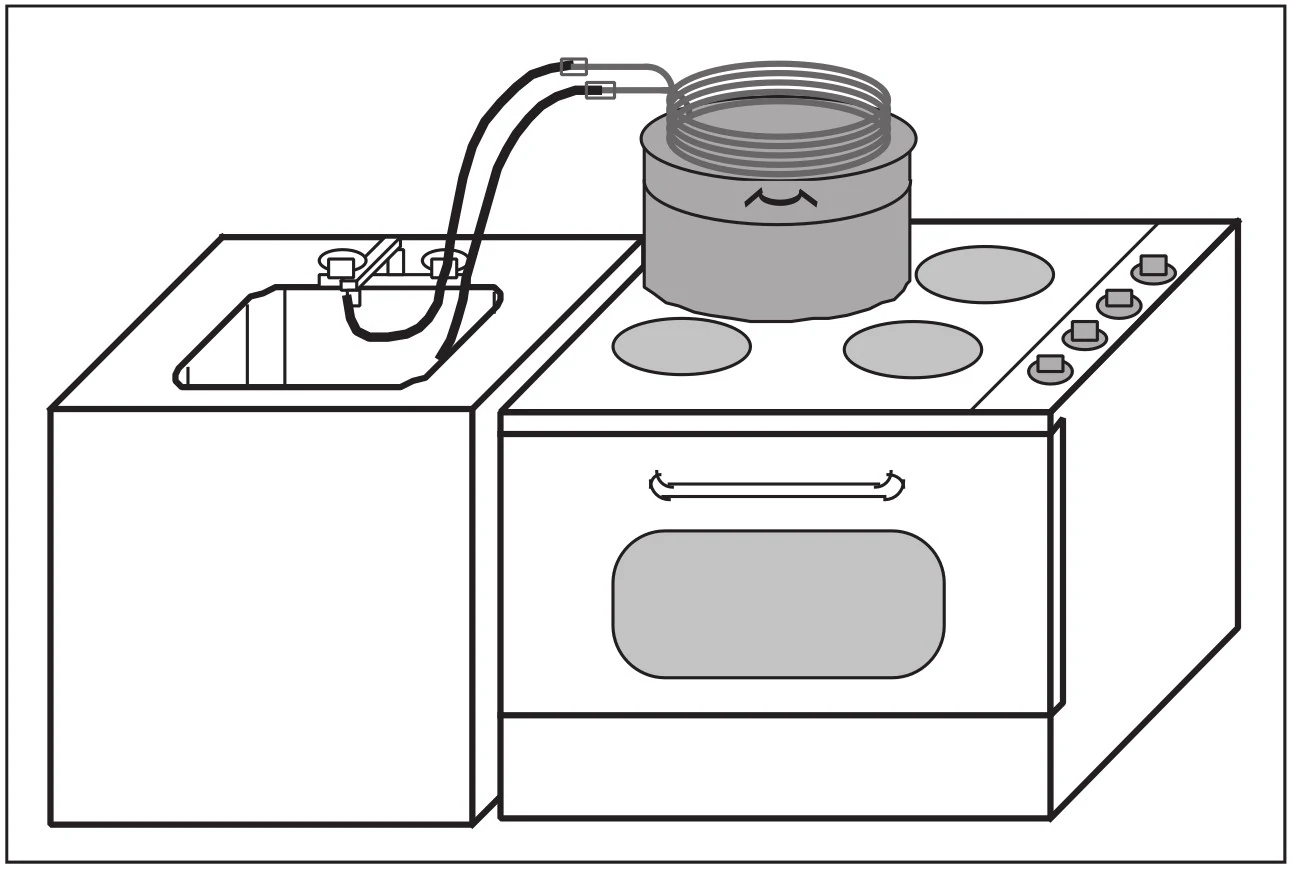
Figure 169 – Immersion chilling on the stove.

Figure 170—Immersion wort chiller. Garden hose fittings not shown. I have used an immersion chiller for at least 3/4 of my batches. Counterflow or Plate chiller for the others.
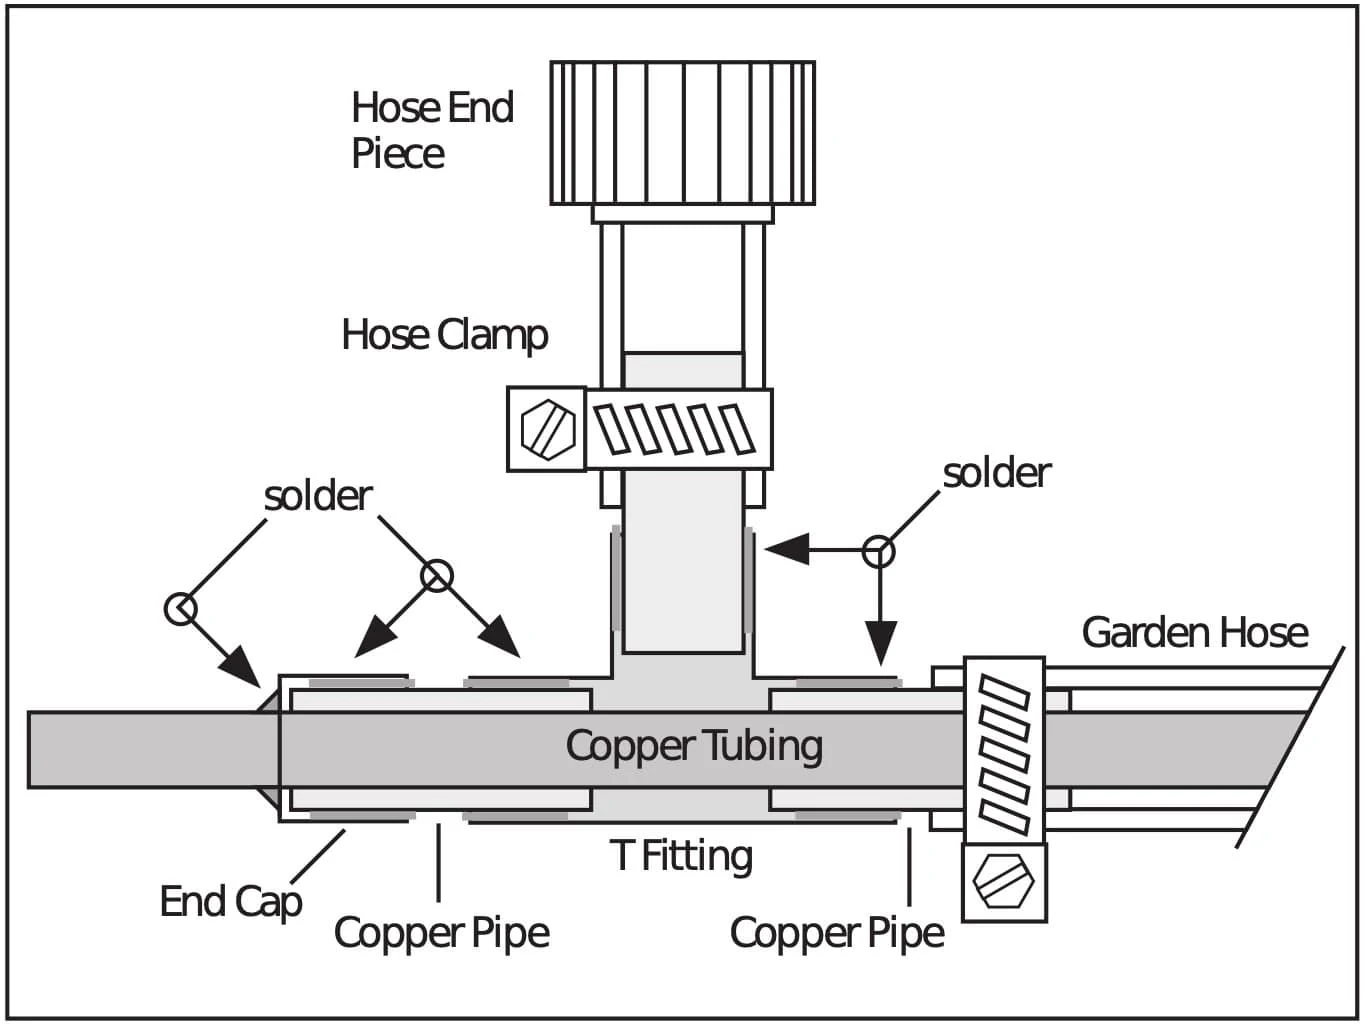
Figure 171—Suggested counterflow wort chiller design. It works quite well.
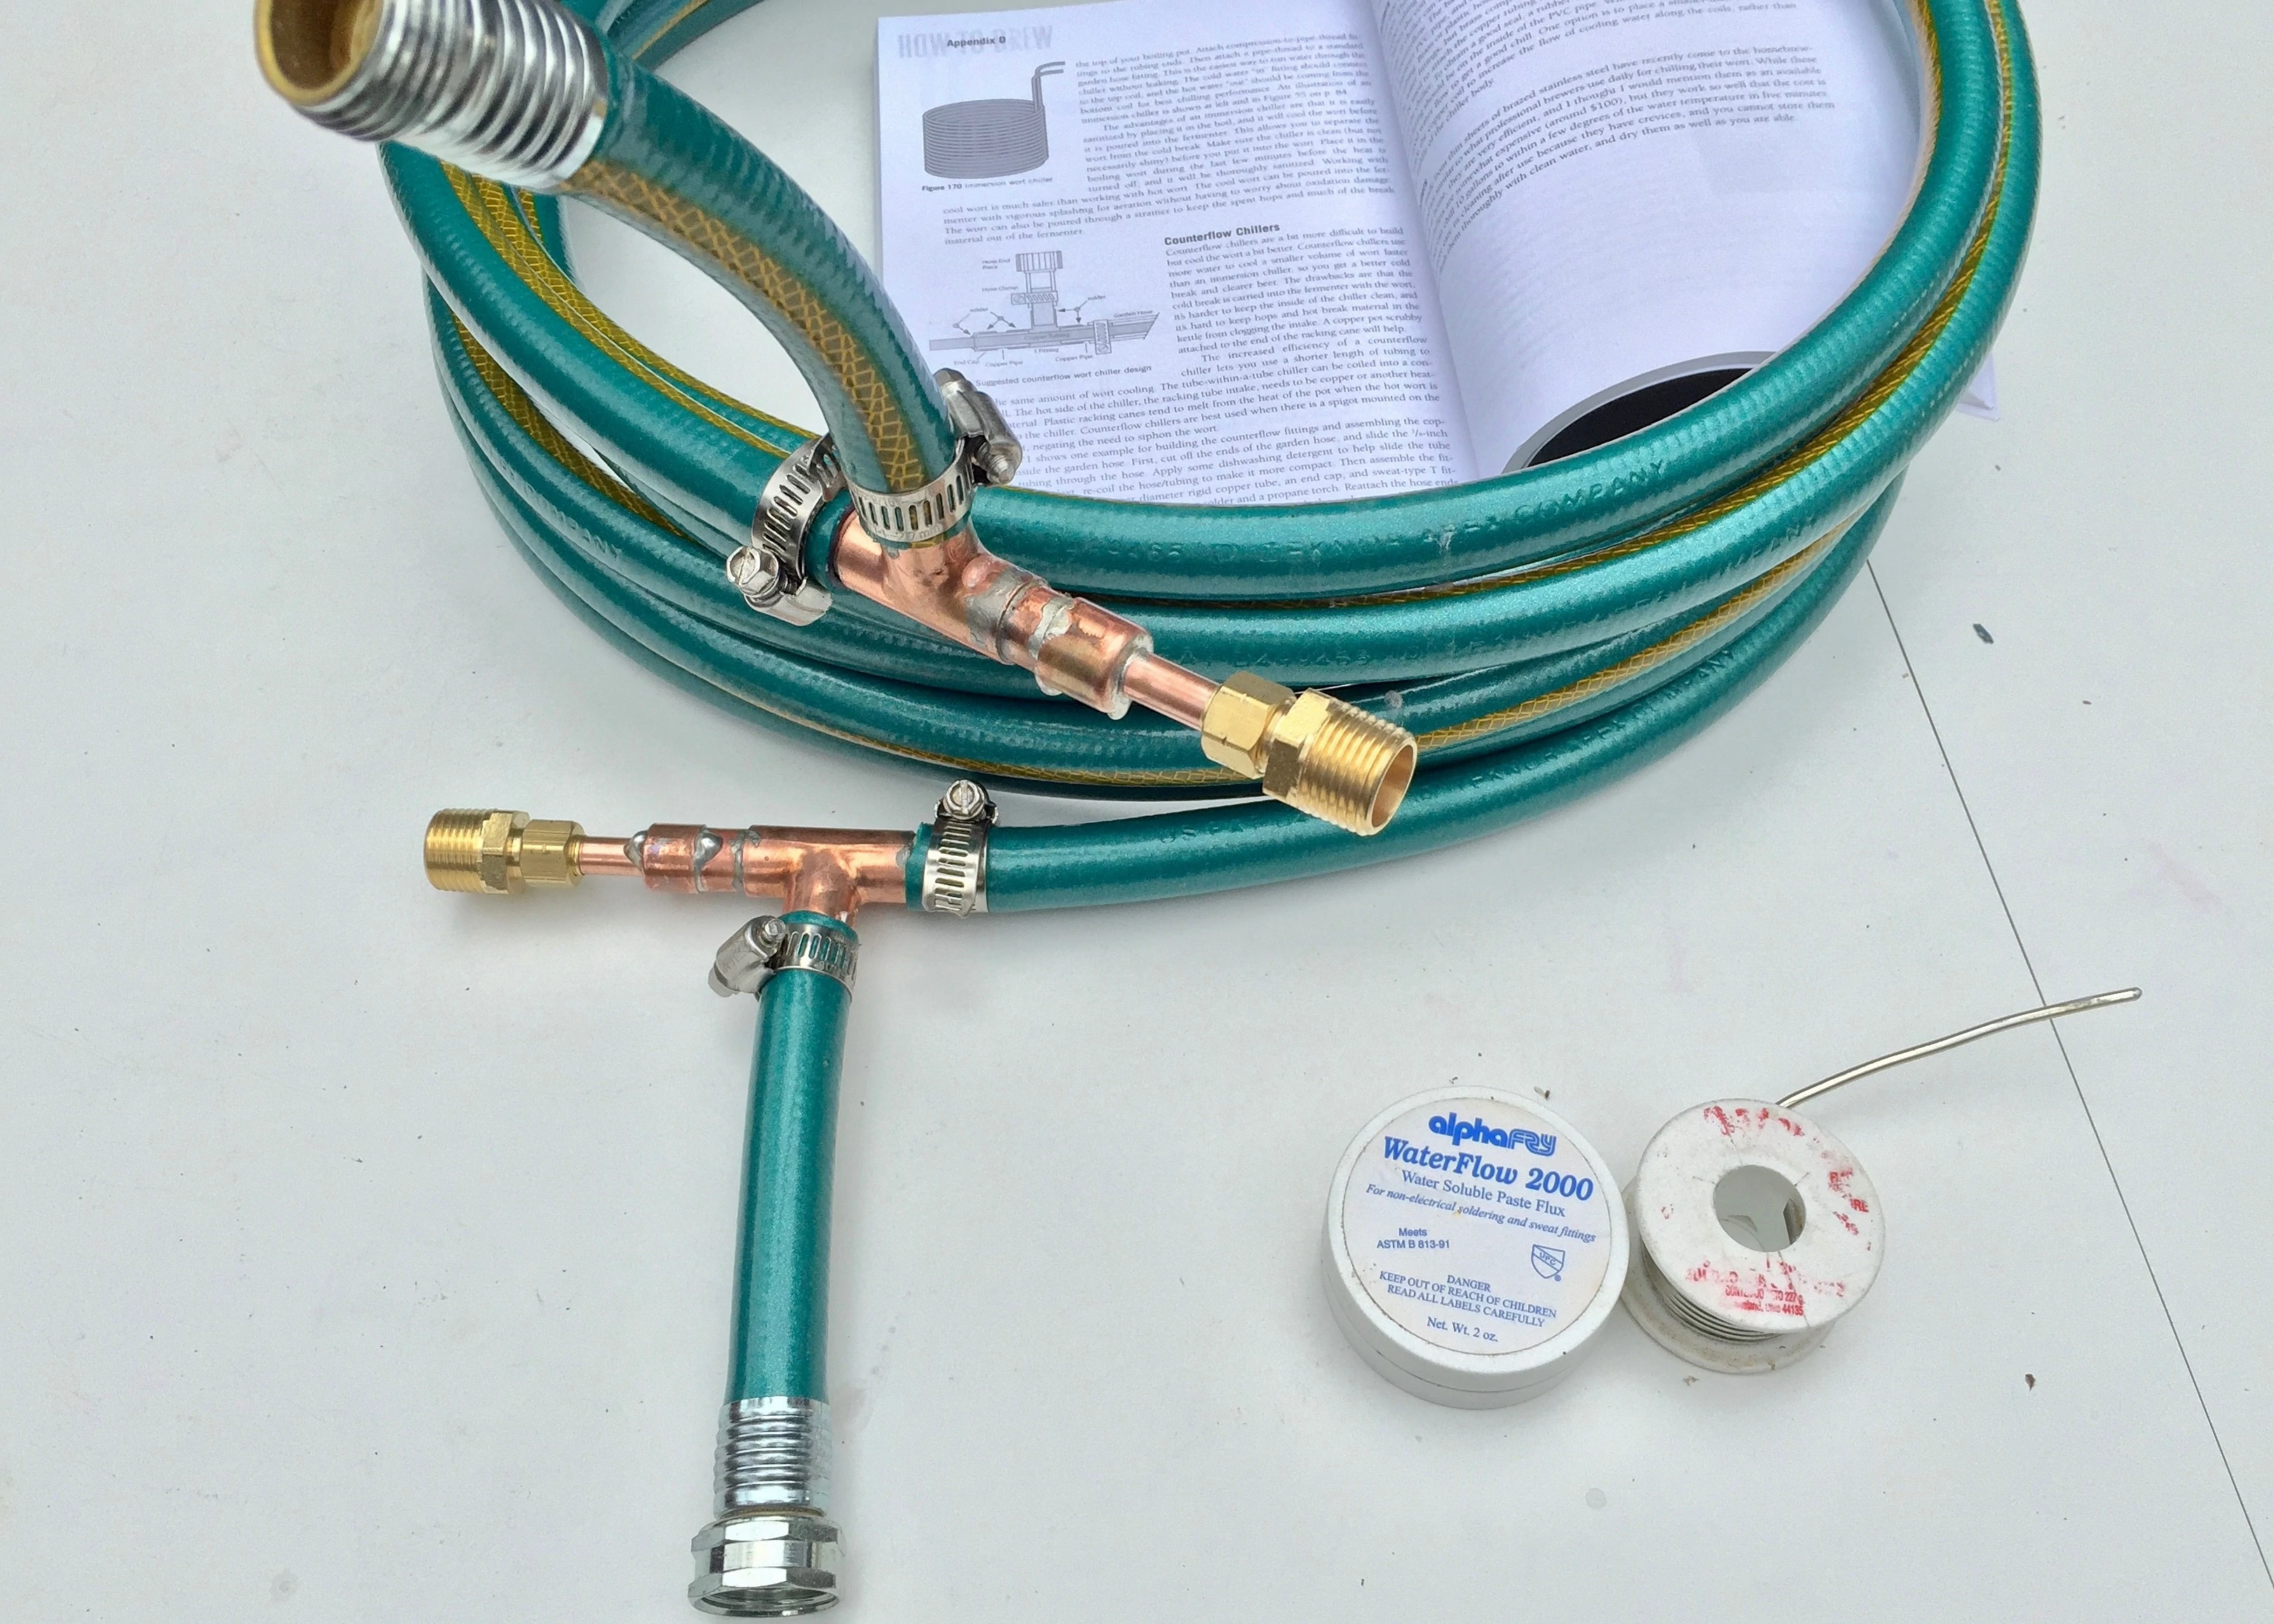
Dish soap helps slide the copper tubing inside the garden hose. I attached 1/2" hose barbs and tubing to convey the wort thru the copper tubing. This is a 25 ft hose.
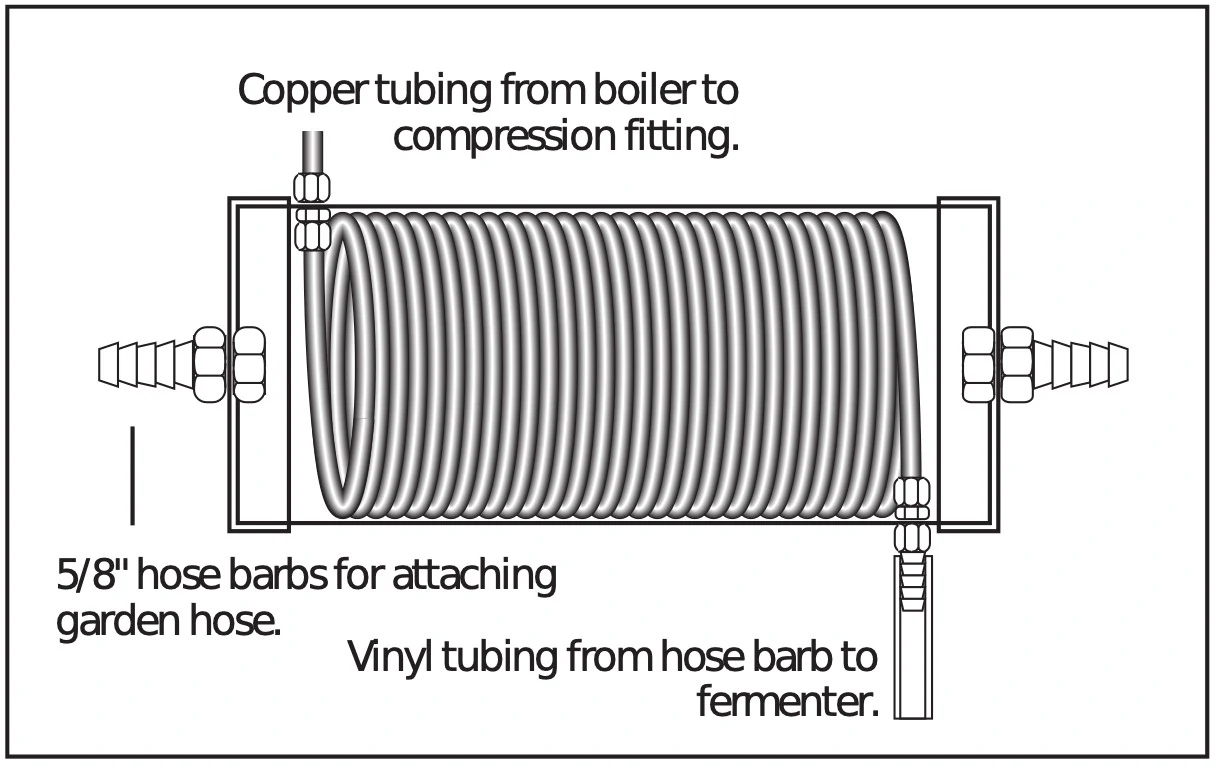
nice graphic, not a very practical design.