Section 1 – Brewing with Malt Extract
Chapter 11 - Priming and Bottling
In this chapter we will focus on getting your hard won beer into a bottle and ready for drinking. To bottle your beer, you will need: clean bottles, bottle caps, a bottle capper and (I heartily recommend) a bottling bucket. You will also need some sugar to use for priming—that extra bit of fermentable sugar that is added to the beer at bottling time to provide the carbonation.
Many homebrewers get used bottles from restaurants and bars, or buy them new from homebrew shops. Every once in a while, you will hear about a guy whose dad or uncle has given him a couple cases of empty swing-top Grolsch™ bottles. He may ask you if he can use them for brewing or something... If this happens, just look him straight in the eye and tell him, “No, those can be quite dangerous, let me dispose of them for you.” Be sure to keep a straight face and do your best to sound grim. If you don’t think you are up to it, give me a call and I will take care of it. Swing top bottles are great; grab any you can. New rubber gaskets for the stoppers can be purchased at most homebrew shops.
When to Bottle
Ales are usually ready to bottle in 2-3 weeks when fermentation has completely finished. There should be few, if any, bubbles coming through the airlock. If you are fermenting in glass, you will see the beer darken and clear as the yeast flocculates. Although 2-3 weeks may seem like a long time to wait, the flavor won’t improve by bottling any earlier. Some older books recommend bottling after the bubbling stops, or 1 week after pitching, but this is usually bad advice. It is not uncommon for fermentation to stop after 3-4 days and begin again a few days later due to a temperature change. If the beer is bottled before fermentation is complete, the beer will become over-carbonated and the pressure may exceed the bottle strength. Exploding bottles are a disaster (and messy to boot).
[figure 70 – bottles and bottle brush]
Bottle Cleaning
As discussed in Chapter 2, used bottles need to be cleaned thoroughly before sanitizing. The first time a bottle is used it should be soaked in a cleaning solution (like bleach water), and scrubbed inside and out with a nylon bottle brush. A heavy duty cleaning is needed to ensure that there isn’t any dirt in which bacteria or mold spores can hide. The sanitizing solution will be able to reach all surfaces and you can be assured of sanitized bottles. If you are diligent in rinsing your bottles promptly and thoroughly after each use with your homebrew, only the sanitizing treatment will be necessary before each use in the future. By maintaining clean equipment, you will save yourself a lot of work.
After the bottles have been cleaned with a brush, soak them in sanitizing solution or use the dishwasher with the heat cycle on to sanitize them. If you use bleach solution to sanitize, allow the bottles to drain upside down on a rack, or rinse them. Also sanitize the priming container, siphon unit, stirring spoon, and bottle caps. But don’t boil or bake the bottle caps, as this may ruin the gaskets.
Which Sugar to Prime With?
You can prime your beer with any fermentable that you want. Any sugar: white cane sugar, brown sugar, honey, molasses, even maple syrup can be used for priming. The darker sugars can contribute a subtle aftertaste (sometimes desired) and are more appropriate for heavier, darker beers. Simple sugars, like corn or cane sugar, are used most often, though many brewers use dry malt extract too. Ounce for ounce, cane sugar generates a bit more carbon dioxide than corn sugar, and both pure sugars carbonate more than malt extract, so you will need to take that into account. For all priming in general, you want to add 2–3 gravity points of sugar per gallon of beer.
As mentioned earlier, you can choose either of two paths when deciding on a priming sugar— do you want keep the priming sugar hiding in the wings or do you want to bring it onstage? The monosaccharides and plain sucrose allow you to carbonate the beer without changing the existing flavor profile. The other sucrose-based sugars: invert sugar syrups, honey and maple syrup, will add some degree of flavor accent to the beer. The next big question is, “How much to use?”
The most commonly quoted answer to this question is 3/4 cup (~4 oz. by weight) of corn sugar for a 5 gallon batch. This will produce about 2.5 volumes of carbon dioxide in the beer, which is pretty typical of most American and European pale ales. Three ounces (weight) will produce a little lower carbonation level of about 2.0 volumes, and five ounces will produce about 3.0 volumes. The point is that 4 ounces of glucose is typically used to carbonate five gallons, and this is the basis for calculating amounts of other priming sugars.For example, let’s calculate how much honey to use to equal 4 oz. (1/4 lb.) of corn sugar. Honey is about 18% water and is quoted as being 95% fermentable.
The equation is:(Weight of A)(Percent Solids of A)(Fermentability of A) = (Weight of B)(Percent Solids of B)(Fermentability of B)(4 oz)(92%)(100%) = (X)(82%)(95%)X = 4.72 oz. of HoneyUsing the Extract Yield numbers from Table 13 below, the equation becomes:(4 oz)(42)(100%) = (X)(38)(95%)X = 4.65 oz. of Honey (which rounds to 4.7)
The calculation for malt extract is similar because it can have a significant proportion of unfermentable sugars, varying from 15-40%, depending on the extract brand and yeast strain. A typical fermentability for malt extract is probably about 75%. The calculation for other sucrose products are more straightforward because the sugars are usually 100% fermentable, except in the case of partially refined sugars like molasses where there is a lot of other material present other than sugar.
Be aware that malt extract will generate break material when boiled, and that the fermentation of malt extract for priming purposes will sometimes (though rarely) generate a krausen/protein ring around the waterline in the bottle, just like it does in your fermentor. Simple sugars don’t have this cosmetic problem and the small amount used for priming will not affect the flavor of the beer.
Author’s note (2025): Just use white table sugar (sucrose). There really is no flavor impact when it comes to priming. It doesn’t have to be special.
Making the Priming Solution
The best way to prime your beer is to mix your priming sugar into the whole batch prior to bottling. This ensures that all the bottles will be carbonated the same. Older books used to recommend adding 1 tsp. of sugar directly to the bottle for priming. This is not a good idea because it is time consuming and imprecise. Bottles may carbonate unevenly and explode.
[figure 71 – racking to bottling bucket]
Here’s how to make and add priming solutions: 1. Boil 3⁄4 cup of corn sugar (4 oz by weight), or 2⁄3 cup of white sugar, or 1 and 1⁄4 cup dry malt extract in 2 cups of water and let it cool. Use the nomograph in Figure 65 to determine a more precise amount of priming sugar if you wish. You can add the priming solution in either of two ways, depending on your equipment; I prefer the first (2a). 2a. If you have a bottling bucket (see Figure 66) gently pour the priming solution into it. Using a sanitized siphon, transfer the beer into the sanitized bottling bucket. Place the outlet beneath the surface of the priming solution. Do not allow the beer to splash because you don’t want to add oxygen to your beer at this point. Keep the intake end of the racking tube an inch off the bottom of the fermenter (most racking canes have an end cap that does this for you) to leave the yeast and sediment behind. 2b. If you don’t have a bottling bucket, open the fermenter and gently pour the priming solution into the beer. Stir the beer gently with a sanitized spoon, trying to mix it in evenly while being careful not to stir up the sediment too much. Wait a half hour for the sediment to settle back down and to allow more diffusion of the priming solution to take place. Use a bottle filler attachment with the siphon to make the filling easier. [figure 72 – priming nomograph]To use the nomograph, draw a line from the temperature of your beer through the volumes of CO2 that you want, to the scale for sugar. The intersection of your line and the sugar scale gives the weight in ounces (either glucose or sucrose) to be added to five gallons of beer to achieve the desired carbonation level. If you are priming more (e.g. six gallons) then the amount of priming sugar can be determined by ratio (e.g. 6/5) to the five gallon amount. Here is a list of typical volumes of CO2 for various beer styles:British ales 1.5-2.0Porter, Stout 1.7-2.3Belgian ales 1.9-2.4American ales 2.2-2.7European lagers 2.2-2.7Belgian Lambic 2.4-2.8American Wheat 2.7-3.3German Wheat 3.3-4.5
Here’s how to make and add priming solutions: 1. Boil 3⁄4 cup of corn sugar (4 oz by weight), or 2⁄3 cup of white sugar, or 1 and 1⁄4 cup dry malt extract in 2 cups of water and let it cool. Use the nomograph in Figure 65 to determine a more precise amount of priming sugar if you wish. You can add the priming solution in either of two ways, depending on your equipment; I prefer the first (2a). 2a. If you have a bottling bucket (see Figure 66) gently pour the priming solution into it. Using a sanitized siphon, transfer the beer into the sanitized bottling bucket. Place the outlet beneath the surface of the priming solution. Do not allow the beer to splash because you don’t want to add oxygen to your beer at this point. Keep the intake end of the racking tube an inch off the bottom of the fermenter (most racking canes have an end cap that does this for you) to leave the yeast and sediment behind. 2b. If you don’t have a bottling bucket, open the fermenter and gently pour the priming solution into the beer. Stir the beer gently with a sanitized spoon, trying to mix it in evenly while being careful not to stir up the sediment too much. Wait a half hour for the sediment to settle back down and to allow more diffusion of the priming solution to take place. Use a bottle filler attachment with the siphon to make the filling easier. [figure 72 – priming nomograph]To use the nomograph, draw a line from the temperature of your beer through the volumes of CO2 that you want, to the scale for sugar. The intersection of your line and the sugar scale gives the weight in ounces (either glucose or sucrose) to be added to five gallons of beer to achieve the desired carbonation level. If you are priming more (e.g. six gallons) then the amount of priming sugar can be determined by ratio (e.g. 6/5) to the five gallon amount. Here is a list of typical volumes of CO2 for various beer styles:British ales 1.5-2.0Porter, Stout 1.7-2.3Belgian ales 1.9-2.4American ales 2.2-2.7European lagers 2.2-2.7Belgian Lambic 2.4-2.8American Wheat 2.7-3.3German Wheat 3.3-4.5
Bottle Filling
The next step is filling the bottles. Place the fill tube of the bottling bucket or bottle filler at the bottom of the bottle. Fill slowly at first to prevent gurgling and keep the fill tube below the waterline to prevent aeration. Fill to about 3⁄4 inch from the top of the bottles. There will be foam filling the headspace; this is good. You want to “cap on foam” to reduce the amount of oxygen in the bottle, which will contribute to staling. Place a sanitized cap on the bottle and cap. Many people will place the caps on the bottles and then wait to cap several at the same time. After capping, inspect every bottle to make sure the cap is secure. [figure 73 – filling from a bottling bucket]
Age the capped bottles at room temperature for two weeks, out of the light. Aging up to two months can improve the flavor considerably, but one week will often do the job of carbonation for the impatient, it depends on the type and vitality of the yeast.[figure 74 – filing using a siphon and bottle filler]Figure 74—Bottling using a siphon with a bottle filler attachment.
Age the capped bottles at room temperature for two weeks, out of the light. Aging up to two months can improve the flavor considerably, but one week will often do the job of carbonation for the impatient, it depends on the type and vitality of the yeast.[figure 74 – filing using a siphon and bottle filler]Figure 74—Bottling using a siphon with a bottle filler attachment.
Priming and Bottling of Lager Beer
Ninety five percent of the time there is no difference between priming for lager beer and priming ale. But once in a while you will need to add fresh yeast for priming and carbonation purposes. This is most common when the beer is given a long cold lagering for more than two months. If the beer is very clear at bottling time, then the majority of the yeast may have settled out and there may not be enough left to carbonate the beer in the bottle. Prepare some fresh yeast of the same strain and mix it with the priming solution when you rack the beer to the bottling bucket. You will not need as much as you originally pitched to the wort, either one ready-to-pitch package of liquid yeast or about 1⁄4 cup of slurry for 5 gallons.
Since the yeast is being added for carbonation after the lagering phase, there are a couple of differences in procedure from that used to ferment the original wort. Grow the yeast at the temperature you will be carbonating and storing the beer at (usually room temperature) instead of the original pitching temperature. This will produce more esters than the yeast normally would, but the percentage of sugar that is being fermented for carbonation at this stage is so small that the added difference in taste is unnoticeable. The reason for doing it this way is to avoid thermally shocking the yeast and to speed up the carbonation time. It is not necessary to store the beer cold after lagering. The beer can be stored at room temperature without affecting the taste of the beer.
Storage
Two common questions are, “How long will a homebrewed beer keep?” and “Will it spoil?” The answer is that homebrewed beer has a fairly long storage life. Depending on the style and original gravity, the beer will keep for more than a year. I occasionally come across a year-old six pack of pale ale that I had forgotten about and it tastes great! Of course, there are other cases when that year-old six pack has gotten very oxidized in that time, tasting of cardboard or cooking sherry. It really depends on how careful you were with the bottling. Quality in, Quality out.
Author’s Note (2025): Beer will get stale with time. It will oxidize. Store it cold for best results. If kept cold, a good beer should still be good up to 6 months as a general rule. But if stored at room temperature the flavors will start staling after 1 month.
When cooled prior to serving, some batches will exhibit chill haze. It is caused by proteins left over from those taken out by the cold break. The proteins responsible for chill haze need to be thermally shocked into precipitating out of the wort. Slow cooling will not affect them. When a beer is chilled for drinking, these proteins partially precipitate forming a haze. As the beer warms up, the proteins re-dissolve.
Chill haze is usually regarded as a cosmetic problem. You cannot taste it. However, chill haze indicates that there is an appreciable level of cold-break-type protein in the beer, which has been linked to long-term stability problems. Hazy beer tends to become stale sooner than non-hazy beer. See Appendix C for more info.
Finally, it is important to keep the beer out of direct sunlight, especially if you use clear or green bottles. Exposure to sunlight or fluorescent light will cause beer to develop a skunky character. It is the result of a photochemical reaction with hop compounds and sulfur compounds. Contrary to popular belief, this is not a character that Heineken, Grolsch, and Molson strive for in their beer. It is simply a result of poor handling by retailers, and storing them under fluorescent lighting. Other beers, like Miller High Life, don’t boil hops with the wort but instead use a specially processed hop extract for bittering that lacks the compounds that cause skunking (and flavor). Brown bottles are best unless you make a point of keeping your beer in the dark.
Drinking Your First Home Brew
One final item that nobody ever remembers to tell new brewers until it’s too late is: “Don’t drink the yeast layer on the bottom of the bottle.”People will say, “My first homebrew was pretty good, but that last swallow was terrible!” or “His homebrew really gave me gas” or “It must have been spoiled, I had to go to the bathroom right away after I drank it.” Welcome to the laxative effects of live yeast!
[figure 75 - pouring beer illustration]
When you pour your beer from the bottle, pour it slowly so you don’t disturb the yeast layer. With a little practice, you will be able to pour out all but the last quarter inch of beer. The yeast layer can really harbor a lot of bitter flavors. It’s where the word “dregs” came from. I remember one time my homebrew club was at a popular watering hole for a Belgian beer tasting. The proprietor prided himself on being a connoisseur of all the different beers he sold there. But our entire club just cringed when he poured for us. The whole evening was a battle for the bottle so we could pour our own. Chimay Grande Reserve, Orval, Duvel; all were poured glugging from the bottle, the last glass-worth inevitably being swirled to get all the yeast from the bottom. It was a real crime—not every beer is a hefeweizen. At least I know what their yeast strains taste like now...
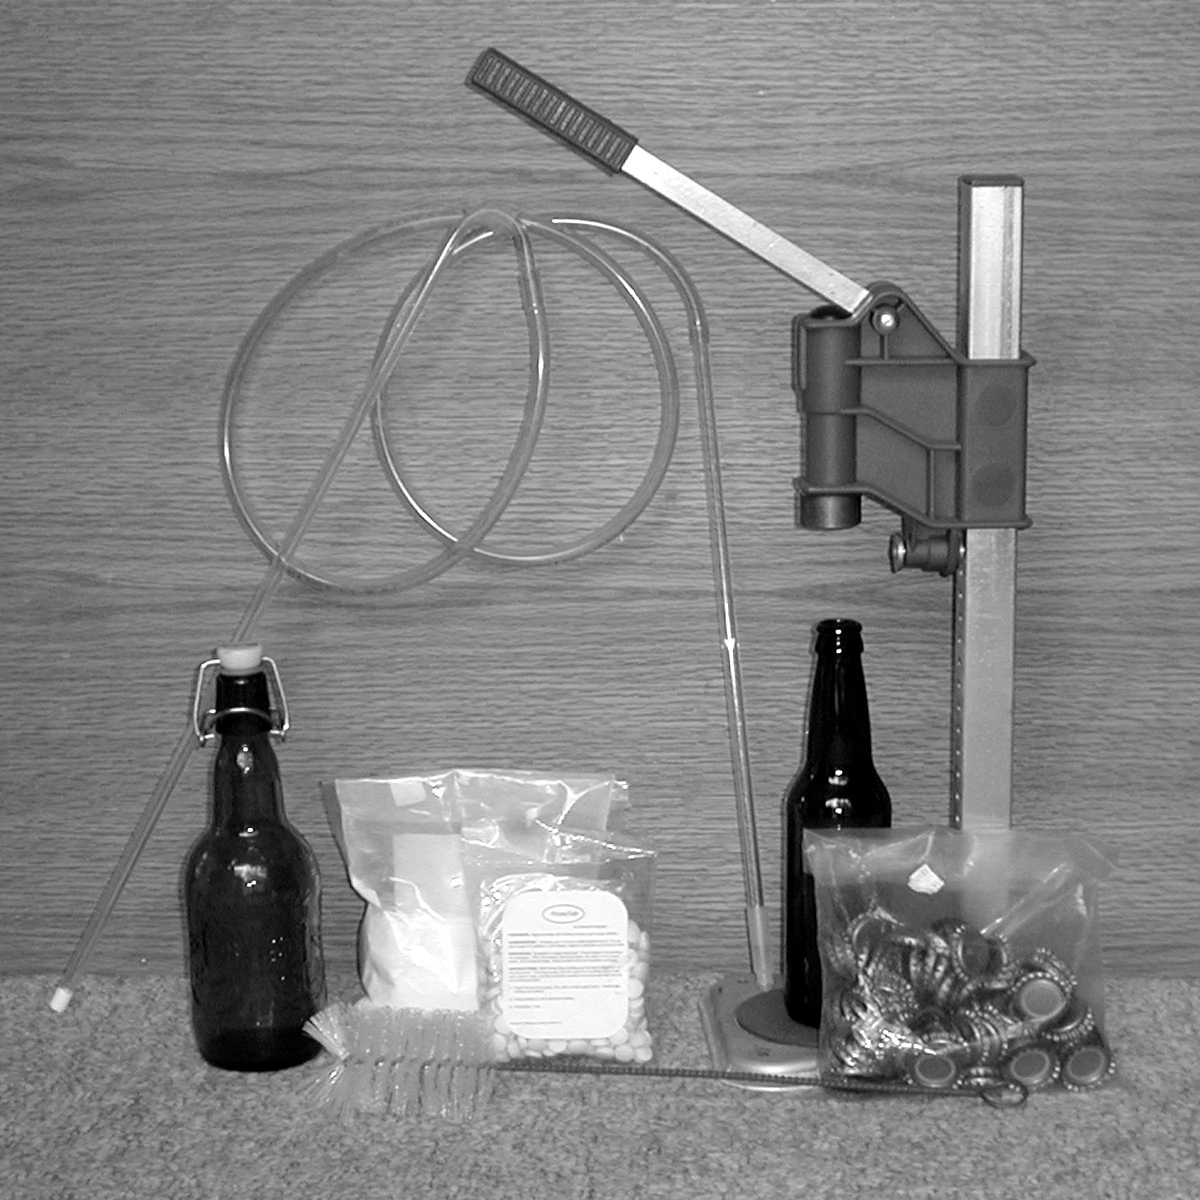
Figure 69 – Bottling Equipment.

Figure 70 – Clean bottles and bottle brush.
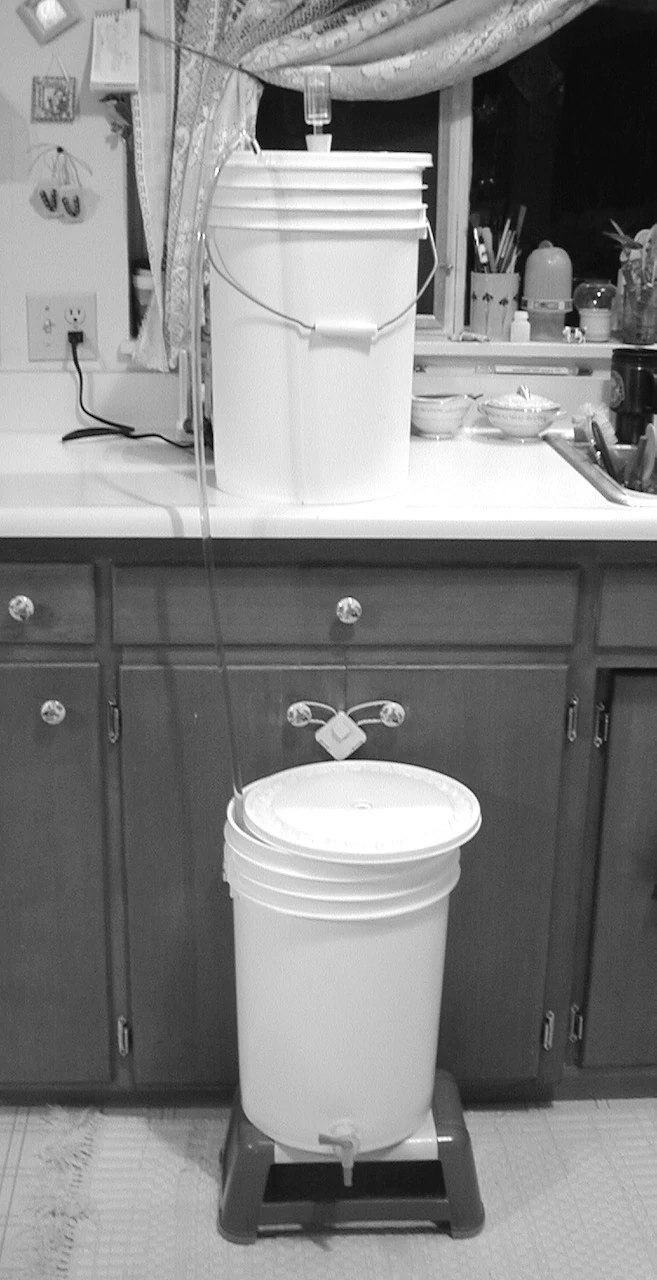
Figure 71 – Racking to the Bottling Bucket.

Figure 72 – Nomograph for determining more precise amounts of priming sugar.

Figure 73—Bottling using a bottling bucket with a filling tube.
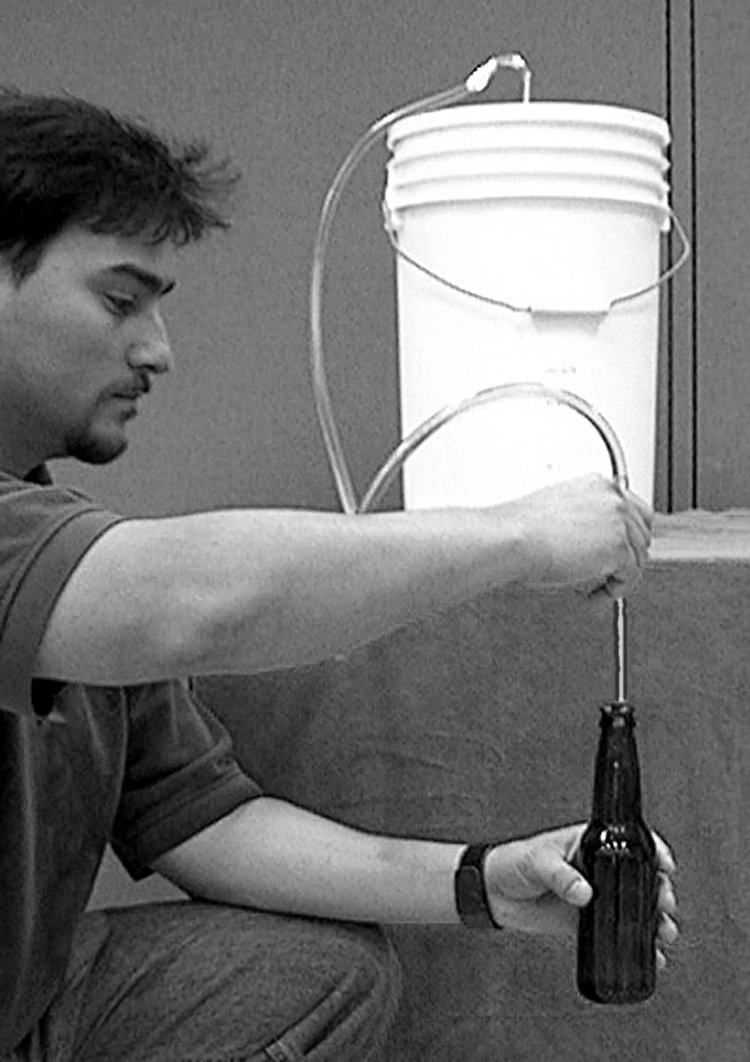
Figure 74 – Bottling from the Siphon with bottling wand.
Table 13 – Priming Sugars for 5 US Gallons
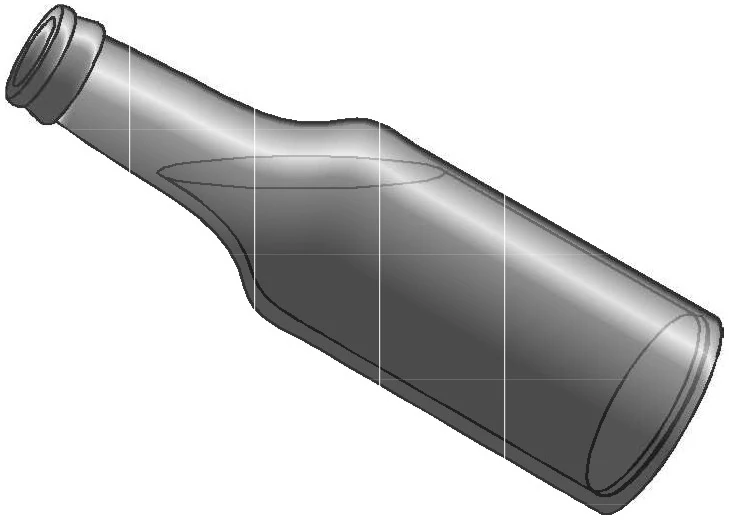
Figure 75– Keep the yeast layer in the bottle! Pour it slowly to avoid disturbing the yeast layer on the bottom. With practice you will leave no more than a quarter inch of beer behind in the bottle.