Section 3 – All-Grain Brewing
Chapter 19 - Mashing Your First Batch
One of the comments you will most often hear from first time all-grainers is, “I didn’t realize it would be so easy!” Making beer from scratch is really very easy, it just takes some preparation and some understanding of what needs to be done.
So far, you have seen the various steps and delved into the details in a few areas, but the best way to learn is by doing. Hopefully you have done several extract batches and a couple extract-and-specialty grain batches by now. You should know to have your ingredients and brewing water ready, with everything clean and sanitized. Unless you have purchased a grain mill, have the grain crushed for you at the brew shop. Crushed grain will stay fresh for about two weeks if kept cool and dry.
Author’s Note, 2025: A Cooler-type mash tun is very retro these days. It is an excellent way to mash but brew-in-a-bag (BIAB) and All-in-One systems, like the Grainfather and Anvil Foundry, have become more popular because there are less vessels to clean up afterwards. The procedures covered in this chapter will help you understand those methods, and of course there are hundreds of Youtube videos out there to show you those methods as well.
Additional Equipment
• Mash/Lauter Tun• Sparge Water Pot (5 gallon minimum size)• Wort Boiling Pot (8 gallon minimum size)• Hydrometer
Mash/Lauter Tun
The easiest way to brew all-grain beer is to use a picnic cooler mash/lauter tun. I described how they can aid mashing and lautering in the last chapter, and instructions for building one are given in Appendix D. A 36-48 quart rectangular cooler or 10 gallon round beverage cooler are probably the best choice.
Sparge Water Pot
You will need a large pot to heat your mash water and your sparge water. You can use your old 5 gallon brewpot for this, or you can purchase a larger 8 gallon pot. You will probably use 3-4 gallons of water for a typical mash, and you will need another 3-4 gallons of water for the typical sparge, so be forewarned.
Wort Boiling Kettle
You will need to get a new brewpot because you are going to be boiling the whole batch. You need a pot that can comfortably hold 6 gallons without boiling over. An aluminum 8 gallon stockpot from a restaurant supply store is probably the best choice at about $80. A more economical alternative is an 8 gallon enamelware pot for about $40, although these are more prone to chipping and scorching. Aluminum has the advantage of good heat conductivity, which helps prevent scorching and boil-overs.
Hydrometer
You will want to purchase a hydrometer if you don’t have one already. A hydrometer allows you to monitor the extraction process and its use is explained in Appendix A.
Suggested Recipe - Brown Ale
For this beer, we will make a Brown Ale, using four malts and a single temperature infusion mash. I will take you through the entire grain brewing procedure and then go back and discuss some options for various steps. Of course, if there is another beer style that you prefer, you are welcome to use one of the other recipes from Chapter 19. Be sure to adjust your hopping schedule to take the full volume boil and lower boil gravity into account. See recipe to the right.
Starting the Mash
1. Heat Brewing Water Heat up enough water to conduct the mash. At a water-to-grain ratio of 2 qt./lb. (4 L/kg), the amount would be 19.5 quarts (18.5 L) or about 5 gallons. Always make more, you will often need it. Heat up 5 gallons (19 L) in the larger of your two brewing pots. At a mash ratio of 2:1, the initial infusion temperature should be 160°F (71°C) to create a mash temperature of 152°F (67°C). Depending on the amount of heat lost to the tun, the strike water could be as hot as 165°F (74°C), but that would (theoretically) create a mash temperature of 156°F (69°C), which would make the wort more dextrinous than we intended, but it would still be a fermentable wort. (See Chapter 16 for the infusion calculations.)
2. Preheat the Tun Preheat the cooler with some boiling water, about a gallon. Swirl it around to heat up the cooler and then pour it back to your sparge water pot. Preheating will prevent initial heat loss from the mash to the tun, which can throw off your infusion calculations.
3. Mash-in You want to add the water to the grain, not the other way around. Use a saucepan or a plastic pitcher to pour in a gallon of your strike water at a time and stir between infusions. Don’t try to pour 4 gallons of hot water into the mash tun all at once. You don’t want to thermally shock the enzymes. Stir it thoroughly to make sure all the grain is fully wetted, but don’t aerate it. Hot side aeration is promoted by a malt enzyme called lipoxygenase at this stage, but it is denatured as the temperature reaches 140°F (60°C). Oxidation of wort compounds will not be affected by the subsequent boil, and will cause off-flavors later.
See Figure 105.Note: If you needed to add any salts to the mash to adjust the mash pH per Chapter 15, add them now.
4. Check the Temperature Check the temperature of the mash to see if it has stabilized in the target temperature of 152°F (67°C) or at least in the range of 150-155°F (65-68°C). If the temperature is too low, ex. 145 °F (63°C), add some more hot water. If it is too high, ex. 160°F (71°C), then add cold water to bring it down. 156°F (69°C) is the highest we would want for this recipe. It will yield a sweet, medium bodied wort with good attenuation. See Figure 106.
5. Adjust the Temperature Okay, the mash temperature came out a little low (148°F) so I added 1.5 quarts of boiling water to bring it up to 152°F. See Figure 107.
Conducting the Mash
6. Monitor Stir the mash every 15-20 minutes to prevent cold spots and help ensure a uniform conversion. Monitor the temperature each time you stir. If the temperature drops by less than 5 degrees over the hour, nothing further needs to be done. Cover the mash tun with the cooler lid between stirrings and let it sit for a total of an hour. If you notice that the temperature drops below 145°F (62°C) within a half hour, you can add more water to bring the temperature back up. See Figure 109.
7. Heat the Sparge Water Meanwhile, heat up your sparge water in the smaller of your two brew pots. You will need about 3.5 gallons (13 liters) for the batch sparge volume. The water temperature should be less than boiling, preferably 165-175°F (73-80°C). If the sparge water is too hot, the probability of tannin extraction from the grain husks increases substantially. See Figure 110.
Conducting the Lauter
Okay, the hour has gone by and the mash should look a little bit different. It should be less viscous and smell great.
8. Recirculate Open the valve slowly and drain about 2 quarts/liters of the first runnings into a pitcher. The wort will be cloudy with bits of grain. Gently pour the wort back into the grainbed, recirculating the wort. Repeat this procedure until the wort exiting the tun is pretty clear (like unfiltered apple cider). It will be dark amber colored, hazy, but not cloudy. It should only take a couple quarts. See Figure 111.
9. Lauter Once the wort has cleared drain the wort carefully into your boiling pot. If you open the valve wide at first you will suck a lot of fine particles into your manifold or screen and can clog it. Only open it partway until it starts running clear. Fill the pot slowly at first and allow the level to cover the outlet tube. Be sure to have a long enough tube so that the wort enters below the surface and does not splash. The splashing of hot wort before the boil can cause long-term oxidation damage to the flavor of the beer. Once the outlet is submerged, you can open the valve more fully and drain the wort more quickly. But if you drain it too quickly you can compact the grain bed and get a stuck sparge. See Figure 112.
10. Add the Sparge Close the valve and add your sparge water to the mash tun with the pitcher until there is a small enough volume to just dump in the rest. Stir the grist thoroughly to dissolve as much remaining sugar into the wort as possible. There is a chance of dissolving unconverted starch into the wort at this stage, so it doesn’t hurt to let the mash sit for 15 minutes to allow residual alpha amylase to convert it to sugars. Recirculate and drain to your brew pot. See Figure 113.
11. Stuck Sparge? If the wort stops flowing, even with water above the grainbed, then you have a stuck sparge. There are 2 ways to fix it: (a) Blow back into the outlet hose to clear any obstruction of the manifold; and/or (b) Close the valve and add more hot water, stirring to re-suspend the mash. You will need to re-circulate again. Stuck sparges are an annoyance, but usually not a major problem.
12. Calculate Your Efficiency Measure the gravity in the boiling pot (stir it first) and multiply the points by the number of gallons you collected. Then divide by the number of pounds of grain you used. The result should be somewhere around 28. 27 is okay, 29 is better, and over 30 is great. If it is 25 or below, you are not getting good conversion in the mash, which could be caused by having too coarse a grist, the wrong temperature, not enough time, or a pH factor, et cetera. (In L°/kg, these numbers are: 234 nominal, with a range of 225-250 L°/kg.)
Okay, throw the spent grain on the compost pile and you are done! You have produced your first all-grain wort! All-grain brewing produces more break material than extract brewing, so you will probably want to add Irish moss during the last 15 minutes of the boil to help with coagulation of the hot break and clarity. Rehydrate it in warm water before use for best results. Don’t overboil or its effects will be lost back into the wort.


Figure 104—The larger of the two brew pots is being used to heat the mash water, and the tea kettle is boiling some water to use for preheating the mashtun.
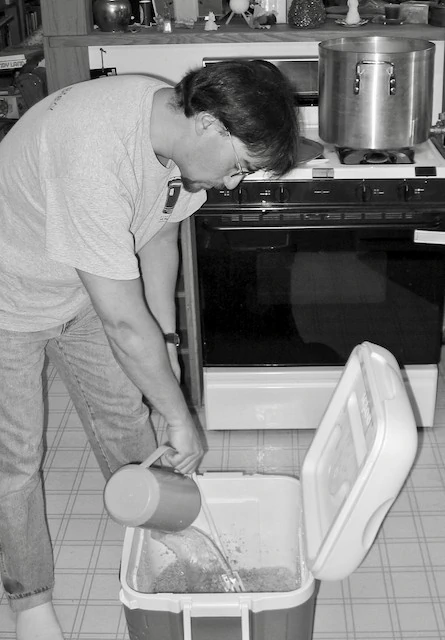
Figure 105—Mashing in with the strike water. Water is added slowly to the grist to avoid thermally shocking the enzymes. I am stirring between infusions. Once I have about half of the water in the mash and the grist is thoroughly wetted, I can pick up the pot and pour the rest of the water in.
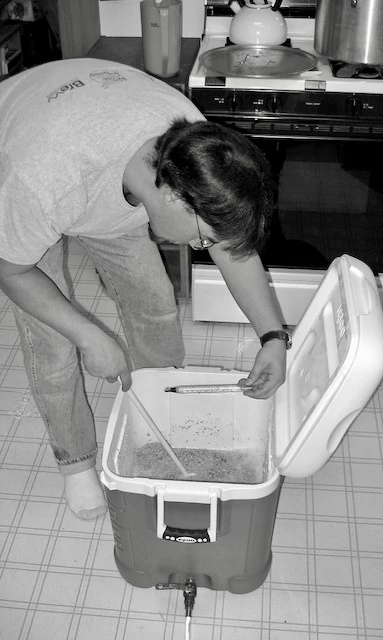
Figure 106—Checking the temperature of the mash after the infusion.
.jpeg)
Figure 107—Adding 1.5 quarts of boiling hot water to raise the mash temperature another 4°F, to 152°F. You need to stir in this very hot water quickly to dissipate the heat quickly and minimize denaturing the enzymes.

Figure 108—A picture of the mash at T = 0. The wort is cloudy with starch.

Figure 109—A picture of the mash at T = 30 minutes. Some of the larger particles are floating around, as are some husks. Notice it has cleared; it is no longer cloudy with starch, and it smells great.
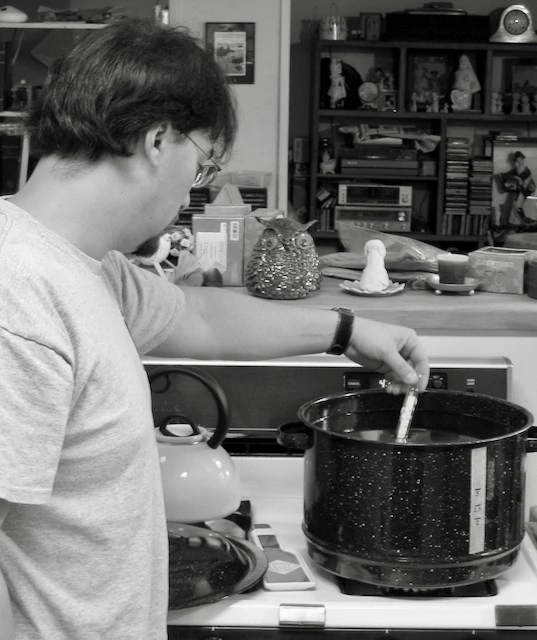
Figure 110 —I am heating the sparge water in my smaller brew pot while the mash is going on.
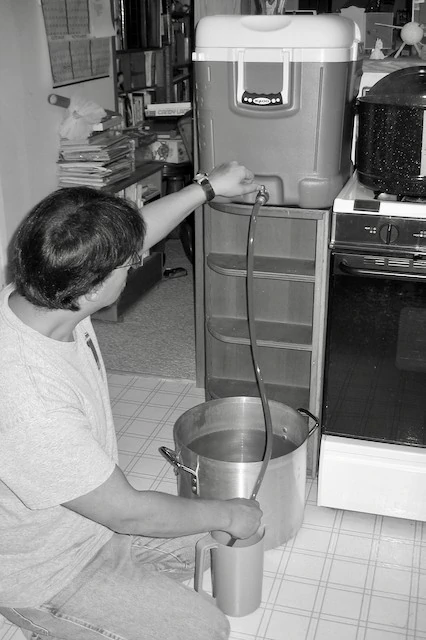
Figure 111— Drain about 2 quarts of the first runnings into a pitcher. The wort will be cloudy with bits of grain. Then, slowly pour the wort back into the grainbed, recirculating the wort. Repeat this procedure until the wort exiting the tun is pretty clear (like unfiltered apple cider). It will be dark amber, hazy, but not cloudy.

Figure 112—I have started draining the lauter tun of the first runnings.

Figure 113—I am adding the sparge water a pitcher at a time until I can just dump in the rest of it, and then I will stir thoroughly to dissolve all the remaining extract into the wort.
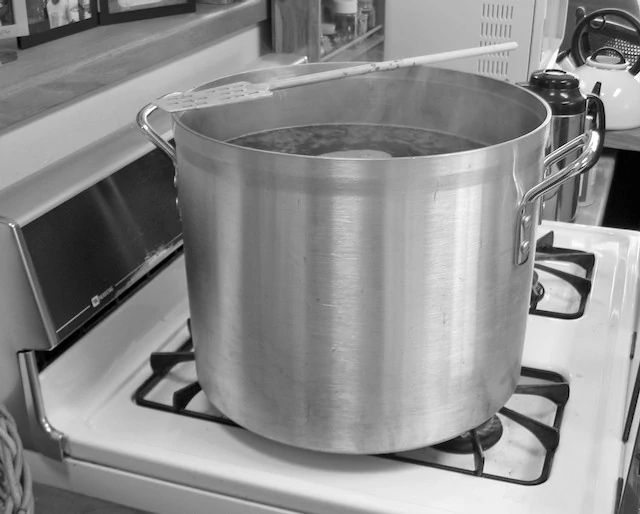
Figure 114—The brew pot is 6.5 gallons full and starting to boil. Oh, that smells good!

Figure 115—Now the boil is over and it’s time to chill the wort. Joe Brewer uses a large immersion wort chiller made from 50 feet of ½ inch diameter soft copper tubing configured in a double coil.

Figure 116—The fermentor is sanitized, and ready to receive the wort. Some Star San foam is still visible in the neck of the carboy. It’s fine; it won’t affect the fermentation at all.

Figure 117—This picture shows the aquarium air pump aeration of the wort. (tubing on the left side.) Aeration is very important for a healthy fermentation.
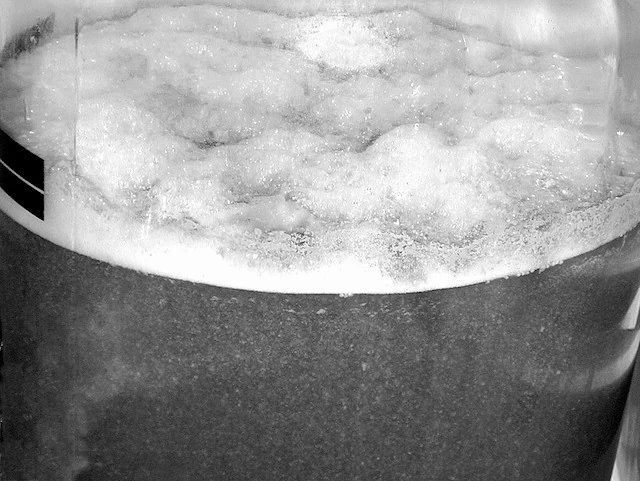
Figure 118—The yeast has been pitched to the wort and now, 8 hours later, a krausen has started to form on top. A blow-off tube is usually not needed for a 5 gallon (20 L) batch fermenting in a 6.5 gallon (25 L) carboy.